All posts in Thrift Stores

Singing the Thrift Store Blues

Bostonian Crown Windsor Tassels

I recently came across a shoe that on the second-hand market that I have been pining over for a long time. This shoe is none other than the cordovan tassel loafer. The only problem was one that all of my thrifters, Ebay scourers, and other experts of the second-hand/vintage clothing markets can relate. Will they fit?
Tassel LoafersCrown Windsors
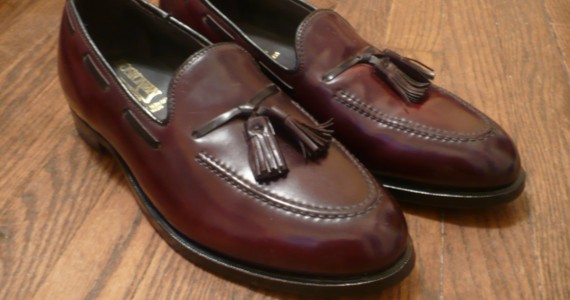
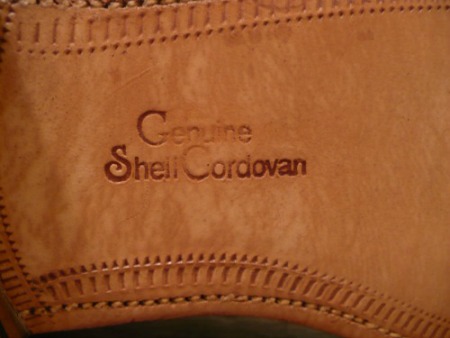
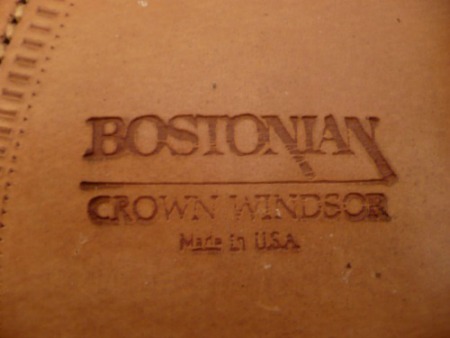
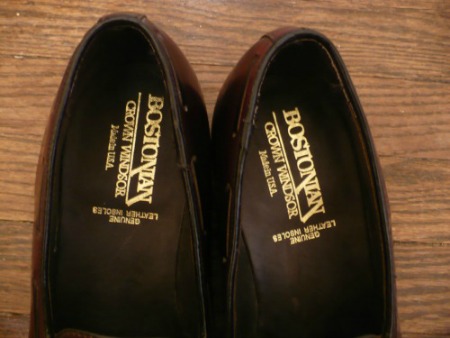
This specific pair of tassels are Crown Windsors made by Bostonian. These tassels are not from the current iteration of Bostonian, but rather from an era when their quality was on par with Allen Edmonds and Alden. This specific pair was being advertised as having not been worn outside, but after taking a close look at the sellers pics I believed them to be new old stock (NOS). The quality, condition, and price (when compared with a new a pair) made them very very attractive to me.

My first move was to do some due diligence. I contacted a man of many tassels that I know and sought his counsel. He could not provide me with any fit information in regard to vintage Bostonian tassels, but he did have other pairs of vintage Bostonians and sent me what info he had. I did some more research on the web and in the end I felt the odds were in my favor. I pulled the trigger.
Genuine Shell CordovanBostonian Crown Windsor
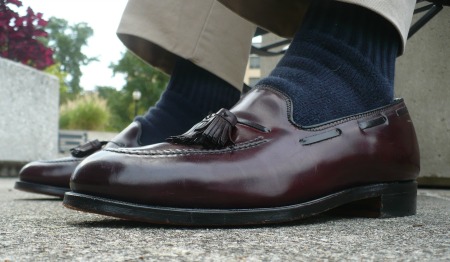
When the shoes arrived they were in spectacular condition. I now fully believe that they have never been worn before at all, inside or outside. I was enamored, but the moment of truth was here. Try on time. They fit a tad big, but I was still hopeful that after a full day of breaking them in that they would work for me. I was wrong. They slipped all day and were even painful. I was and still am crushed.

This sad story is one that I know many of you have experienced. It is also why I am weary of the second-hand/vintage market. While I can certainly get my money back out of them it involves me reselling them which in my opinion is a form of torture. Moving forward I will be purchasing less and less from this market as I can afford it, but for now I will just sing you my thrift store blues.

Tie Collection

Featured image

My ties needed to be reorganized. The current tie set-up was a dresser drawer. All the ties were rolled and very organized. However, this made it hard to try on more than one in the morning and I didn’t think that it was good for the shape of the ties either. I have decided to move them to a tie rack. I got them all out in preparation for the move and was a little surprised how much my little collection had grown.

Ties to be alteredTies to be altered (narrowed, bow tied, etc.)

Two years ago I had fewer than 10 ties. This was not problematic as I rarely had the opportunity to wear one. At some point, I decided that it would be a good idea to stock up on ties and that future me might appreciate that. Two years later and I now have around 50 ties. I have also started to wear a jacket and tie on Tuesday/Thursday. Guess what? Future me appreciates past me’s decision.

Okay, not all of these ties were purchased at a thrift store. 8 were purchased via Etsy and another internet re-seller, 3 were purchased at the Brooks Brothers outlet, and  2 were gifts. The other 80% of the ties were purchased at thrift stores and kept, or traded away for others.

Similar TiesNot twins, but maybe brothers or cousins. The tie on the left is Brooks Brothers and the tie on the right Gant.

Thrift stores have proved to be an invaluable resource for acquiring ties cheaply. If I take my time I can usually find at least one tie at every store, which is a great ROI. It does require a lot of patience. You will sort through tons of ties, find one you like, and then find the stain. It is often painful to find that stain. In fact, I have learned not to get too excited until I have done a thorough examination. Which leads me into a short rant:

Why do thrift stores accept flawed ties? I understand that “beggars can’t be choosers,” but who would benefit from a stained tie? The only person that I can imagine who might be interested in a stained tie would be someone who would use it for the material. So, all stained ties, if accepted (and I don’t think that they should be) should be placed in a bin marked as “Flawed Ties.”

Sorry for the rant, but it needed to said. The moral of this story is to be patient and consistent when looking for ties at thrift stores. Eventually you will have a day like this one (Tie Haul). String a few of these together over the course of a few years and you will have a nice collection of ties before you know it. I do want to leave everyone with something to think about. Why aren’t there more striped ties at thrift stores?

Ties are  3” and 3.25” width with less than a handful of 3.5” width ties

 Red Striped TiesTie Collection Red Stripes Close-up

Blue Striped ties

Tie Collection Blue Close-upTie Collection Green & Yellow StripesTie Collection Green & Yellow Stripes Close-up

Tie Collection - SkinnyTie Collection - PatternsTie Collection - Pattern Close-upTie Collection Patterns 2Tie Collection Patterns 2 Close-upTie Collection Pines & ConesTie Collection Pines & Cones Close-upTie Collection PaisleyTie Collection Paisley Close-upTie Collection EblematicTie Collection Emblematic Close-upTie Collection KnitTie Collection  Knit Close-upTie Collection Bow TiesTie Collection WoolTie Collection Wool Close-up


How to Shorten a Surcingle Belt: A Tutorial

I recently purchased a navy surcingle belt that is 6 sizes too big for me at thrift store for $5 with the intention of shortening it. The leather was really nice, I don’t have a navy surcingle, and I had previously read that this is a very easy modification to make.  Fast forward two months and I am about to find out just how easy it is.

This project requires only requires a few tools. The best part is that you probably already have them. You will need a needle, heavyweight thread, pliers, a seam ripper, scissors, chalk, a small clamp (I used a binder clip) and a belt that fits.

Tools Needed A few of the required tools (missing  from the pic are scissors, thread, chalk, a small clamp and a belt that fits).

My first step was to remove the seams. I chose the tab with the buckle, because it had a much smaller area to stitch. On many surcingle belts either end may be a possibility. This was the easiest part.

Seam RipperSeams Ripped

Step two, measure the belt. This is why you need a belt that fits. First, I aligned the hole that I use on the belt that fits with hole that I want to use on the new belt. Next, I lined the buckle that I had just detached up with the old buckle. I marked this spot with chalk, but you could use whatever you have. Chalk just happened to be handy.

Buckles lined upLine up the buckles and mark with chalk.

Now it’s time to cut your new belt. I cut the belt about an inch above my chalk line leaving myself enough fabric to be sewn into the tab. You may want to trim down the edges of the belt so that it does not stick out the sides of the tab. I didn’t make the end pointed as the fabric was not sticking out beyond the edges in this instance.

If you do want to make the end slimmer, the trick to this is to cut from the middle and pull in the sides to create the point. If you cut the down the outside edges it will lead to fraying. You will want to staple or sew the two sides together to make sure the point is stable. I learned this trick when I saw how it was originally attached.

Cut from the middle of the beltHere you can see how they removed some of the middle and stapled it together.

Now it’s time to sew the belt back together. Before your starting sewing you want to make sure that the needle you are going to use fits through the pre-existing holes in the leather. The first needle I tried was too large. Now that I think about it a much smaller needle would probably work. In fact, this could be a lot easier and is something that I will experiment with in the future.

Two different sizes of needlesI used the needle on the right.

Okay, now it is time to actually sew the belt back together. Thread your needle, pick a place to start, and have at it. You will want to get something to clamp the buckle in place while you are sewing. I used a binder clip as an afterthought and it worked just fine. Try not to skip any holes like I did (3 in fact).

Sewing 1Sewing 2 Getting the needle through both holes was fairly easy (some went smoother than others) and I am not familiar with sewing at all. After you get the needle through both holes you will want to use your pliers to pull the needle all the way through. Now just keep repeating this process until you have made it back to your starting point and knot off the thread. Your belt is now complete!

Use pliers to pull through

Finished, but with a  few mistakesCan you spot my mistakes?

This was an easy project has opened up a lot of belt possibilities for me. All in all, I spent about an hour and fifteen minutes from start to finish. If I was to do this again (which is only a matter of time) I think I could do it in 30 minutes. I predict that my collection of surcingle belts is about to experience a serious influx.

My New Navy Surcingle Belt

How to Tie a Bow Tie: The Illustrated Edition

How to tie a bow tie featured image

I found my first thrift store bow tie (and a diamond point at that!) during a mid-week thrift. Needless to say I was pretty excited. As soon as I got home I went to try it on and embarrassing as this is to admit, I couldn’t tie it. Now, I only learned to tie a bow tie in December (Holiday Bow Tie), but you would think that I could remember how to do it, because it was not that long ago and I probably tied the knot 100 times while learning, and I like to think of myself as smart. So, I did what anyone who needs to learn anything does these days and turned to the internet.

It only took a moment looking at an illustration to recover my senses and tie my bow. However, I spent another hour looking at all of these great instructional drawings. I was impressed with the sheer number of them and they reminded of vintage menswear ads which I love. I have rounded up a few of my favorite images. I hope that you enjoy them as much as I did!

Thrifted Diamond Bow TieDiamond Point Bow Tie

Southern ProperHow To Tie A Bow TieSouthern Proper

How to tie a bow tie Art of ManlinessArt of Manliness

Bearings Bow tie IllustrationAtlanta Bearings – A Southern Lifestyle Guide for Men

the natty urbanite bow tieThe Natty Urbanite

Rocco's How to tie a Bow TieRocco’s Gentleman’s Clothing

Refined Vanguards - How to tie a bow tieRefined Vanguard Tumblr

Old Time How to Tie a Bow Tie

how to tie a bow tieBudweiser - How to tie a bow tie

Thrifting & Patience

I have mentioned that patience plays a major role in successful thrifting and my latest tie haul has proved just that. Last week I was on my way home from work when I thought that I would quickly pop in one of my regular thrifting spots. It had been a long time since I had purchased anything from this store, but I knew that it was only a matter of time and this was my lucky day.

5 Classic Ties

A wonderful assortment of ties

As soon as I got near the tie section I spotted what looked to be a repp tie. When I got closer it turned out that not only was there a repp tie, but there were a few repp ties and two other gems as well. The ties most likely all belonged to that same person. I say this because all of the ties were from two local and now defunct menswear stores(minus the one Brooks Brothers tie).

My streak of good luck did not end there and I will offer this advice as to why. If you find a few items that you think all belonged to one person go back in a couple of days and see if there is more. This is exactly what I did and it paid off. I stopped back in a few days later and there were 4 more ties. All in all, I scored 9 beautiful ties for $4.50.

4 more classuc ties4 more ties!

Woodhouse Lynch Clothiers Tie Lablel

D.H. Peer, Ltd Tie

Authentic English Regimental


This thrift has encouraged me to learn more about these two local menswear shops. I was already familiar with Woodhouse Lynch Clothiers from an earlier thrift. I then found this article on Tom Lynch in the Columbus Dispatch (see here). Jerry Woodhouse the other owner is currently the president St. John’s Bay Rum and was featured on Ivystyle.com (see here). However, I still need to know more. On the other hand, I have not heard much about D.H. Peer, Ltd. I do know that they were located in the Dayton, OH area and operated from the early ‘80s though the late ‘90s. Needless to say I have a lot more to learn.

Hopefully I will have more to share about these establishments in the future as everything that I have found by them has been excellent. If anyone out there has any information or stories that they would like to share please contact me at oxfordclothbuttondown@gmail.com .

More Tie Pics!

Non-Stripe Tie Close-ups

Brooks Brothers Tie Close-up

Green Flower Close-up

DH Peer Close-up