Archive for February, 2013

How to Shorten a Surcingle Belt: A Tutorial

I recently purchased a navy surcingle belt that is 6 sizes too big for me at thrift store for $5 with the intention of shortening it. The leather was really nice, I don’t have a navy surcingle, and I had previously read that this is a very easy modification to make.  Fast forward two months and I am about to find out just how easy it is.

This project requires only requires a few tools. The best part is that you probably already have them. You will need a needle, heavyweight thread, pliers, a seam ripper, scissors, chalk, a small clamp (I used a binder clip) and a belt that fits.

Tools Needed 
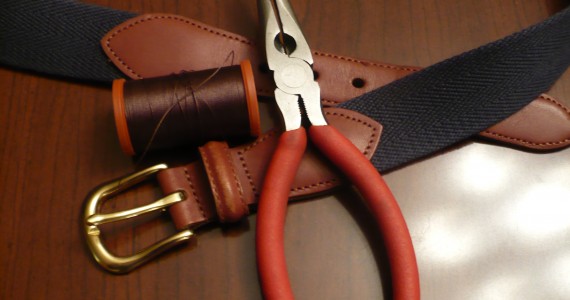
A few of the required tools (missing  from the pic are scissors, thread, chalk, a small clamp and a belt that fits).

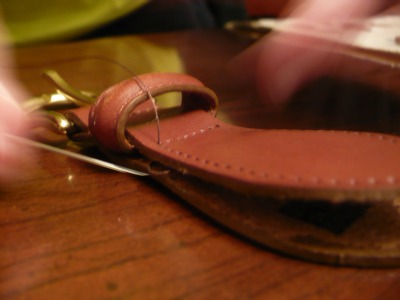
My first step was to remove the seams. I chose the tab with the buckle, because it had a much smaller area to stitch. On many surcingle belts either end may be a possibility. This was the easiest part.

Seam RipperSeams Ripped

Step two, measure the belt. This is why you need a belt that fits. First, I aligned the hole that I use on the belt that fits with hole that I want to use on the new belt. Next, I lined the buckle that I had just detached up with the old buckle. I marked this spot with chalk, but you could use whatever you have. Chalk just happened to be handy.

Buckles lined upLine up the buckles and mark with chalk.

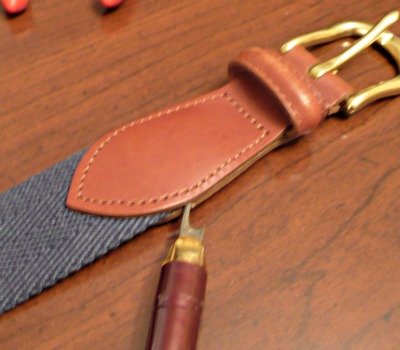
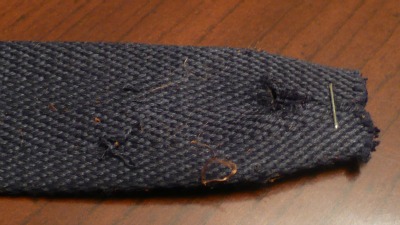
Now it’s time to cut your new belt. I cut the belt about an inch above my chalk line leaving myself enough fabric to be sewn into the tab. You may want to trim down the edges of the belt so that it does not stick out the sides of the tab. I didn’t make the end pointed as the fabric was not sticking out beyond the edges in this instance.

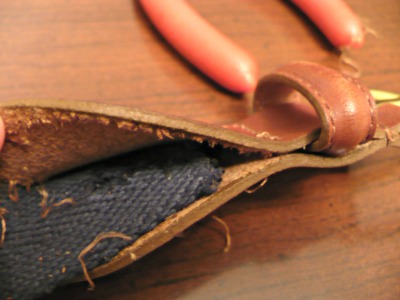
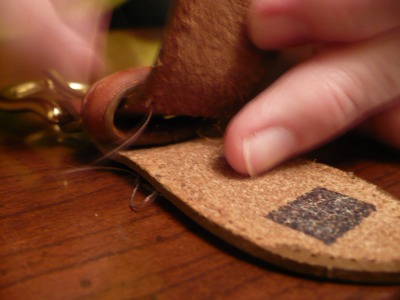
If you do want to make the end slimmer, the trick to this is to cut from the middle and pull in the sides to create the point. If you cut the down the outside edges it will lead to fraying. You will want to staple or sew the two sides together to make sure the point is stable. I learned this trick when I saw how it was originally attached.

Cut from the middle of the beltHere you can see how they removed some of the middle and stapled it together.

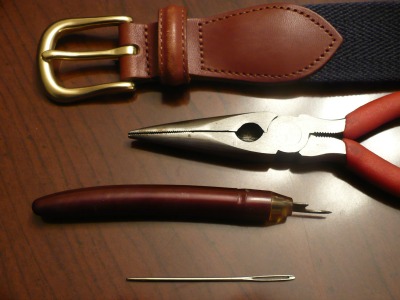
Now it’s time to sew the belt back together. Before your starting sewing you want to make sure that the needle you are going to use fits through the pre-existing holes in the leather. The first needle I tried was too large. Now that I think about it a much smaller needle would probably work. In fact, this could be a lot easier and is something that I will experiment with in the future.

Two different sizes of needles
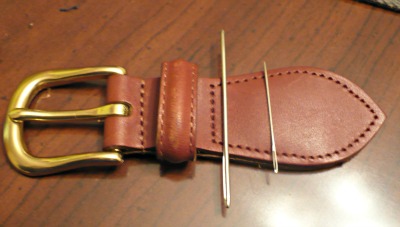
I used the needle on the right.

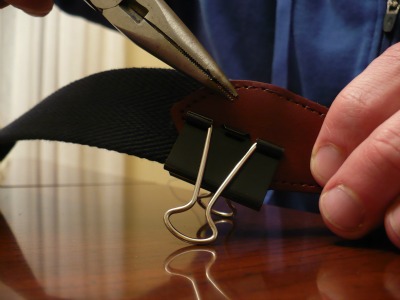
Okay, now it is time to actually sew the belt back together. Thread your needle, pick a place to start, and have at it. You will want to get something to clamp the buckle in place while you are sewing. I used a binder clip as an afterthought and it worked just fine. Try not to skip any holes like I did (3 in fact).

Sewing 1Sewing 2 Getting the needle through both holes was fairly easy (some went smoother than others) and I am not familiar with sewing at all. After you get the needle through both holes you will want to use your pliers to pull the needle all the way through. Now just keep repeating this process until you have made it back to your starting point and knot off the thread. Your belt is now complete!

Use pliers to pull through

Finished, but with a  few mistakes
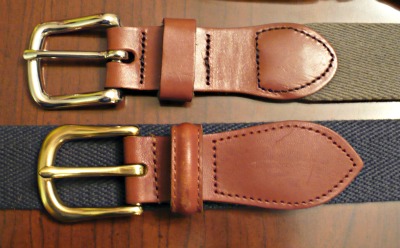
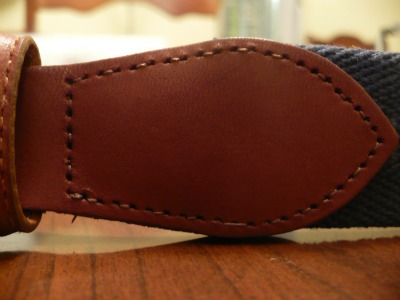
Can you spot my mistakes?

This was an easy project has opened up a lot of belt possibilities for me. All in all, I spent about an hour and fifteen minutes from start to finish. If I was to do this again (which is only a matter of time) I think I could do it in 30 minutes. I predict that my collection of surcingle belts is about to experience a serious influx.

My New Navy Surcingle Belt

How to Tie a Bow Tie: The Illustrated Edition

How to tie a bow tie featured image

I found my first thrift store bow tie (and a diamond point at that!) during a mid-week thrift. Needless to say I was pretty excited. As soon as I got home I went to try it on and embarrassing as this is to admit, I couldn’t tie it. Now, I only learned to tie a bow tie in December (Holiday Bow Tie), but you would think that I could remember how to do it, because it was not that long ago and I probably tied the knot 100 times while learning, and I like to think of myself as smart. So, I did what anyone who needs to learn anything does these days and turned to the internet.

It only took a moment looking at an illustration to recover my senses and tie my bow. However, I spent another hour looking at all of these great instructional drawings. I was impressed with the sheer number of them and they reminded of vintage menswear ads which I love. I have rounded up a few of my favorite images. I hope that you enjoy them as much as I did!

Thrifted Diamond Bow TieDiamond Point Bow Tie

Southern ProperHow To Tie A Bow TieSouthern Proper

How to tie a bow tie Art of ManlinessArt of Manliness

Bearings Bow tie IllustrationAtlanta Bearings – A Southern Lifestyle Guide for Men

the natty urbanite bow tieThe Natty Urbanite

Rocco's How to tie a Bow TieRocco’s Gentleman’s Clothing

Refined Vanguards - How to tie a bow tieRefined Vanguard Tumblr

Old Time How to Tie a Bow Tie

how to tie a bow tieBudweiser - How to tie a bow tie

New Year’s Resolution: Jacket & Tie

I have had this conundrum for a while. I look at, discuss, and even write about jackets, yet I hardly ever get to wear one. To top it off, I have acquired around 50 ties through dedicated thrifting and many of them have never seen the light of day. In order to rectify this situation I made a New Year’s resolution to wear more jackets and ties.

Brooks Brothers Navy Sack Blazer

The biggest hurdle to keeping this resolution is my company’s dress code. The dress code is a very casual business casual which means that dungarees are abundant and my chino/OCBD “uniform” is viewed as dressy. While many people believe that a dress code is instituted to set a minimum standard, it is also sets a ceiling for what is acceptable.

Green Tie & Grey Jacket

The ceiling is a  not as clear as the minimum primarily because of the  unspoken rule that superiors should dress better than their subordinates. For instance, the uniform of a general in the military is more intricate and ornamented than an officer. This military example translates into the private sector in the form of suits, shirts, ties, and shoes. There is an unspoken expectation that a subordinate will not attempt to outrank his superior in terms of dress. Basically, I knew that I was treading into uncertain territory.

Southwick Jacket & Fox Tie

Despite my concerns about upsetting the natural order of the org chart I decided to carry out my resolution. I chose Tuesday/Thursday as the two days a week that I would wear a jacket and tie. I picked these days because the office is emptier on these days and it would allow me to fly under the radar. The first day was not as bad as I expected. Sure I had to weather a few “got a job interview today?” comments and other snarky remarks, but not nearly as many as I had anticipated.

Tweed & Paisley close-up

I am so glad that I made this resolution. At least for now there has been no major push back from management and all I had to do is to put up with a little teasing from my co-workers, which I was going to have to endure about one thing or another anyway. For this small price getting ready for and going to work has been so much more enjoyable. I have been able to wear ties and jackets that had not been touched up to this point and really learn about what works , what doesn’t, and what looks best on me. I can’t believe that I have been putting off one of life’s simple joys for so long. Now I just need to get more jackets.

BONUS PICS

Duffle Jacket & Brooks Brothers Blazer

Brooks Brothers Navy Sack Blazer

Lands End Repp Tie

Tweed Sack JacketTweed Sack & Repp Tie

Brooks Brothers Sack Jacket in Grey Herringbone

Green Tie & Grey Jacket

Brooks Brothers Sack Blazer

Repp Tie & Blazer

Southwick Sack BlazerGrey Herringbone Sack JacketRepp Tie and Grey Herringbone

Grey Herringbone & Red Repp Tie

Red Repp Tie & Grey Sack Jacket

The Great American Haircut

I have written about many of the pieces that make up traditional American style, but there is one very important piece that I have not covered; it’s not clothing related, but it is very visual: the haircut. A clean shave and a well-kempt haircut have always been a big a part of the “look.” Although, there is no one “look.”

College Boy HaircutThis is a Great Haircut (image from Ivystyle,com)

So, what is this haircut? There are lots of acceptable versions, but the rule of thumb is short and neat. It is a little longer on top than the sides, tapered back, tapered sides, short sideburns, and of course a side part (generally on the left). Below are a few acceptable styles from the movie “The Man Who Wasn’t There.”

The IvyThe Ivy

The Junior ContourThe Junior Contour

The Executive ContourThe Executive Contour

More important than the specific style is the upkeep. I get my haircut every two weeks which allows for me to keep my hair looking pretty consistent. I know this primarily because people rarely, if ever, notice when I get a haircut, which I take as a compliment. I also go to the same barber time and time again. This is crucial, because it may take a few haircuts for you to achieve the cut you want. The last thing that you want to do is to go to a new barber every time that you get your haircut.

Ivy League Hair?My Haircut

The Princeton haircut?My Haircut Part 2

Selecting a hairstyle is just as important as selecting your wardrobe. Find a style that flatters your face and a barber that can cut it. Next, remember to visit him regularly and to treat him well. You can have on the nicest suit, most beautiful tie, and cordovan shoes that shine like a mirror, but a bad haircut will overshadow it all.